Pages

Showing posts with label do-it-yourself. Show all posts

Tuesday, February 27, 2018

Orneriness

For the past several days we've been having fits with our fridge.

The fridge when it was new. in 2011.

I guess most people have problems with their refrigerator from time to time, but when ours starts giving us trouble, it means a lot of head scratching and trying different since because most repair people wouldn't have a clue how to fix it. Because it's a gas refrigerator, running on natural (wellhead) gas.

When we put in the free gas that was part of the deal for allowing a gas well on our property, we decided to convert as many appliances to gas as possible. So stove, dryer, hot water, heat and the fridge are now gas, and most of the time it's just lovely.

But there are those times.

Like when the gas suddenly goes off for no apparent reason--usually when it's dead cold. Most of the time it's an easy fix--just push down the plunger thingie on the regulator and then re-light all the pilots.

And like when the fridge acts up. Wellhead gas is not as clean as the gas you get through the pipelines, and it can cause some issues. Especially, apparently, with the refrigerator's heating element. It might sound odd that there is heat in a fridge, but the flame heats the gas that moves through some convoluted pipes and chills down. That's about as good as I can explain the process. It usually works like a dream and we love it that our fridge works when the electricity goes off.

But when it goes out or suddenly doesn't cool like it should, then we don't like it so much. Sometimes it's as easy as cleaning out the flue (yes, there's a flue on the fridge, weird I know). Other times it means moving the whole thing out and cleaning the condenser coils and whatever else is back there. Then there is cleaning the gas orifice itself.

And when all that fails, we found yet one more trick: laying the fridge on its side and then standing it back up again. Because sometimes a bubble can form in the condensed gas and block it from cooling as it should.

This time we ended up doing all of the above. None of it worked.

Getting by without refrigeration in winter isn't too difficult. A cooler on the porch will usually handle most of the important things.This past week we had quite a few days, though, when the temperatures stayed above 50. So that meant Plan B: freeze jugs of the emergency water we have stored away and using that in the cooler and the fridge.

The fridge is working again, kind of. With the jugs of ice it's down to about 47f in the bottom and it's freezing things in the top freezer compartment as it should. But it's not back to normal yet because the flame isn't acting as it should--going up and down when the thermostat is adjusted. It stays exactly the same no matter when temperature we set it at.

So Monday I called the number we had for repairs. A young-sounding man answered and listened to my tale of woe. He had Larry check a few things, then promised to call back.

Several hours later he was back on the phone. Our refrigerator is not a model he was familiar with so he had to do some calling and checking around himself. He came to the same conclusion we had: the thermostat is bad.

I was all ready with a credit card to pay for the part, but he said no, he'll mail the part and after we put it on and it's working correctly he'll send an invoice and we can mail a check. How old school is that? So kudos to this company for some really good customer service. I'll have to add their name here when I am sure what it is because they'd changed names since I last called four years ago).

We're managing fine with the ice jugs routine in the meantime. But it does make us wonder if this refrigerator is worth the savings in electricity. Maybe it's time to throw in the towel and go back to easy.

We like being independent but it's an awful lot of work and aggravation. And because we're not well off we can't just call repair people to come and fix stuff. Today, Larry's outside tracking down and repairing a leak in the water line from the well to the house. Fortunately it's sunny and not too cold. But we're getting a little old for things like lifting refrigerators. And lifting refrigerators and other such jobs is getting old too.

Maybe it's just plain orneriness that makes us cling to this lifestyle. Or maybe it's just plain being dumb. When all is fixed and running smoothly again, we'll have to look back and evaluate.

Right now, it just feels like aggravation.


Copyright Susanna Holstein. All rights reserved. No Republication or Redistribution Allowed without attribution to Susanna Holstein.

Thursday, April 30, 2015

The Strawberry Barrel

When I showed Larry a photo of a strawberry barrel, he got a bee in his bonnet about making one. We had the barrel, given to us by our friend Jason. It was perfect for this project.

So Larry got busy with a drill and some plans we found online here. The end result:


A barrel full of berry plants! 


 The process is really simple. Drill the holes for the plants, drill drain holes in the base, add gravel or broken clay flower pots in the bottom for drainage, and add a tube with drain holes in it down the center for watering. Then start putting in dirt (We used MiracleGro Moisture Control, pricey but worth the cost), and put gravel in the tube as you go. Plant the plants as each level of holes is reached, and keep repeating the steps until the barrel is full. 


I can't wait to see how this does for us. Our old berry patch was taken over with perennial weeds, as so often happens, and cleaning it each year was back-breaking work. We are hopeful that we will get a good crop of berries with much less work. I chose everbearers because I like having fresh berries throughout the year. With Larry's diabetes, we don't eat much jam any more so a few in the freezer an fresh to eat throughout the growing season is a good option for us.

One more thing off the to-do list!

Copyright Susanna Holstein. All rights reserved. No Republication or Redistribution Allowed without attribution to Susanna Holstein.

Tuesday, January 20, 2015

Dryer Lint and Old Candles=?

Most people might answer that lint and old candles are trash, and they're right, to a point. But they can have a second life, offering themselves up as a sacrificial victim to fire.

Well, that's dramatic, isn't it?

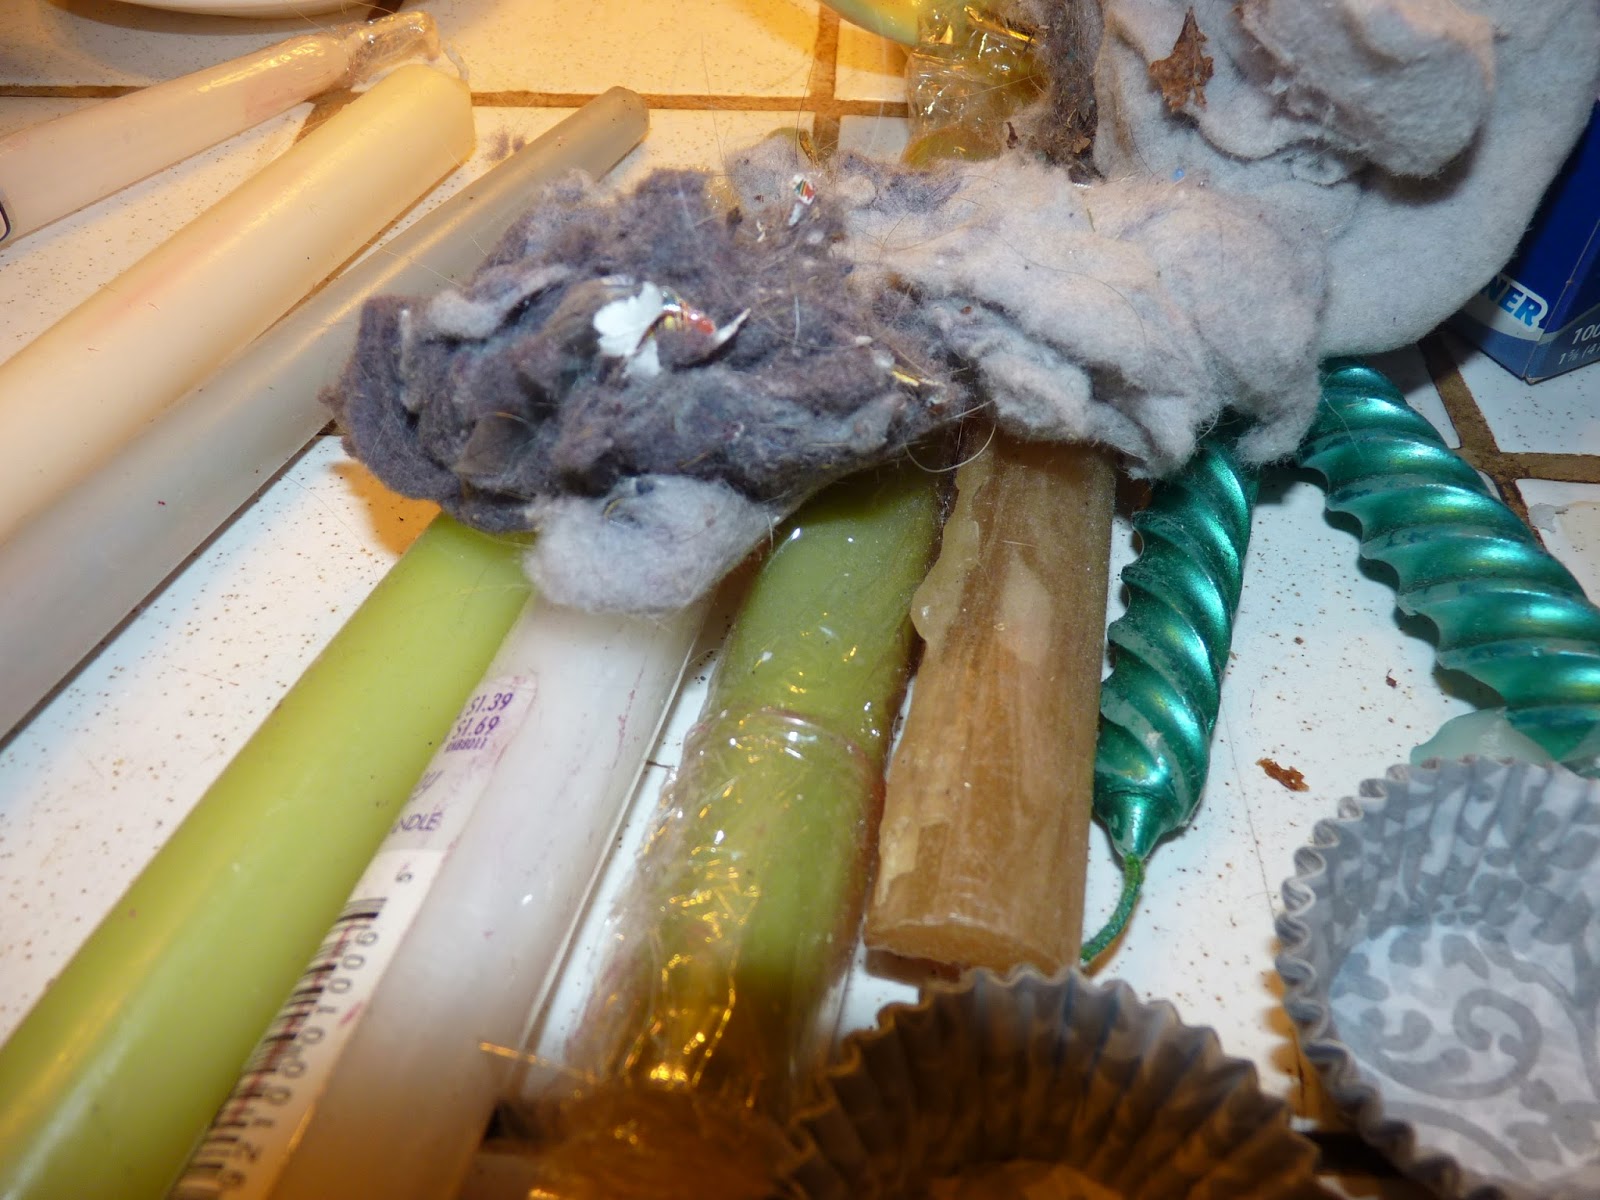
Here's what I mean, really: old candles and your dryer lint can be used to make firestarters. Our state parks in West Virginia have something similar available to people who rent cabins: a cake of wax with what looks like sawdust mixed in, waiting in a basket on the mantel for quick and easy fire starting. I found out how to make a slightly different version on Facebook, and it really does work--and uses two things I would otherwise toss in the trash.

The process is simple. First, plan ahead by saving dryer lint and your old candles, or find used candles at thrift stores and yard sales. I got a bundle of about 20 candles for $1.00 last summer. Most of them weren't nice enough for using in the house, but they were perfect for this project.

1. Melt the candles in a double boiler or other pan. Remove the wicks and toss--or you can use them as I did, cutting them into short lengths to use as lighting wicks for the firestarters.

2. Use cupcake liners in a muffin tin, or use cardboard egg boxes to hold your starters. Fill the liners or the egg box compartments with dryer lint, packing it down firmly. If you want to use the wicks, place the short pieces you cut into the lint with the tip sticking up, just like a candle.

3. Carefully pour the melted wax over the lint until the liner or egg box compartment is full.

4. Let the wax firm up, then remove the cupcake liners from the muffin tin or cut apart the egg box so that each compartment becomes a single firestarter.

5. Clean up your mess! Wax is tricky to clean off utensils and pans, but try putting them in the freezer until the wax is hard, then take out and let them sit for a bit. The wax will usually peel right off.

It's that simple. I  made 24 the other day in about 15 minutes, using the egg box method. Before Christmas I made them for gifts using the small tart-size cupcake liners and putting the cakes into old blue quart jars with zinc lids.

Now I'm on the hunt for more old candles. I have plenty of starters made for the fireplace, but it will soon be firepit season, you know!

Copyright Susanna Holstein. All rights reserved. No Republication or Redistribution Allowed without attribution to Susanna Holstein.

Friday, January 10, 2014

The Beauty of Olive Oil

Is your skin dry this winter? Do you get shocked every time you touch something? Does your  hair stand out like a freaky halo when you try to brush it? Then read up: this might be a solution to all three.

 Some years ago when we still had TV I heard a guest on Good Morning America recommend using olive oil as a moisturizer and as a makeup remover. According to this lady (whose name I cannot remember) Italian women have been using olive oil as a beauty aid for centuries.

I meant to try it but never got around to it until this year. I'm here to tell you, it's awesome. And I found a few tricks that I want to pass on.

First, it doesn't take much! A tiny squirt will easily moisturize both hands.

Second, I didn't want to go around smelling like olive oil, so I added a tiny bit of lavender oil to my little bottle. I love the scent of lavender and it masks the olive oil beautifully. I have to say though that the olive oil aroma really was very minimal, and not noticeable.

Three: you need only 3 things to make this awesome remedy: olive oil, lavender oil, and a small spray bottle. The oil won't come out of my bottle in a spray; it's more like little drops but that works fine for my needs.

Since using the olive oil, I have had zero problems with static electricity shocking me at every turn. I hate that! A little olive oil rubbed into my hands seems to have cured that little surprise of nature.


I also use it in my hair. Again, it doesn't take much! I squirt out just a wee little bit, usually one squirt, rub it into my hands, then run my hands through my hair. Instant tameness. If my hair still seems too dry, I use a little more. But it takes a miniscule amount. My hair is not greasy and it smells like lavender. Mmmmm.

The olive oil as a makeup remover trick works well too. You might want to use a little more for this purpose. It's a wonderful moisturizer. Rub on the oil, wipe off with cotton balls or tissues, then wash with a gentle facial soap.

Most makeup removers and body lotions are based on some kind of oil anyway; this just goes straight to the source, and no added chemicals. Give it a try--I bet you'll like the results as much as I do.

Copyright Susanna Holstein. All rights reserved. No Republication or Redistribution Allowed without attribution to Susanna Holstein.
Wednesday, June 5, 2013

It Works! Cleaning Stained China

It really works! A while back I wrote about a remedy I had found online at How to Clean Stuff for cleaning those brown stains so often found on old china pieces. I have passed up so many pretty dishes because of the unsightly stains, assuming there was no way to correct the problem.

Wrong. There is a way. I tried it and it worked beautifully.


I posted a little about it a couple months ago, when I decided to try the solution on a lovely blue and white English porcelain casserole dish I'd found in an auction lot. The dish was perfect, no chips or cracks--but the glaze had crackled (crazed) and the inside of the dish had several brown stains. I figured I had nothing to lose by trying to fix it.

Here is the dish before when I was experimenting with different ways to clean it. First I tried a baking soda paste (top of the photo), but that did nothing to correct the problem. Then I tried toothpaste (in the bottom part of the photo); again, no luck. The website said to use high strength (3%) hydrogen peroxide that can be bought at hair salon supply companies. I am miles from any place like that, but I did have a jug of Clorox 2, and I knew that it contained a high percentage of peroxide, so I decided to try that. I put a wad of paper towels in the bottom of the dish, then filled the dish with Clorox 2. I left it like that for a month.

The result:

This lovely dish is ready to sell!

Linking today to Housewife How-To's. Be sure to visit there for lots of great ideas!


Copyright 2012 Susanna Holstein. All rights reserved. No Republication or Redistribution Allowed without attribution to Susanna Holstein.

Tuesday, May 7, 2013

Microwave Popcorn: Do It Yourself

I always thought that microwave popcorn had to be bought in those bags at the store. And that there had been some process done to the popcorn kernels before they were packaged to make them pop in the microwave so nicely.

Surprise! A friend told me that I could pop just regular popping corn in my microwave. And it was as simple as a bag, some popping corn, three minutes and done.

So I tried it. And guess what? She was right. It is as simple as this:

1. buying popping corn at the store (for a LOT less than the microwave bags).


2. put 1/2 cup in a paper lunch bag. Fold the top over about 3 times to seal the bag as well as possible. A piece of tape might be a good idea, although I have not done that...yet.


3. put the bag on its side in the microwave with the fold UP and cook on HIGH for 3 minutes.

That's it--it's done! I added salt and a little melted butter when the popcorn was done, and it was delicious, light and fluffy and even better than the stovetop popcorn I've been making.

Not all my kernels popped; there were quite a few unpopped in the bag when I removed it from the microwave. Had they all popped, 1/2 cup might have been too much. My corn is about a year old; I bought a 9-pound bag on Amazon for really cheap and we had not used a lot of it. But with this method, I expect to use up my old corn pretty fast. So if you try this, you may want to start with 1/3 cup.

If you try this, let me know how it worked for you. It certainly is a much cheaper--and just as fast as the store-bought bags of microwavable popcorn.

Linking to Housewife How-To Tuesday and Try a New Recipe Tuesday today. Check them out for some great ideas!

BTW, you can buy as huge bag of popcorn on Amazon, still: Weaver Handi Pak Gourmet Popcorn - 4 pk. - 12.5 lb. - Popcorn Packaging & Accessories (Google Affiliate Ad)


Copyright 2012 Susanna Holstein. All rights reserved. No Republication or Redistribution Allowed without attribution to Susanna Holstein.

Monday, March 4, 2013

The Baby Chicks Are Here!

We picked up our baby chicks today. Some years I order them, but this year I decided to see what the feedstores might bring in, and also see if it's less expensive to buy them locally.

I was well pleased with the variety of chicks available today. White Rhode Islands, Buff Orpingtons, Americaunas (these lay the blue and green eggs), partridge rocks, and a few other kinds were available. I picked an assortment of kinds, 15 babies in all. They are a quiet lot, and seem to be happy in their new home.

Larry originally put a big heat lamp on them which is why the photos look red. I thought we were going to end up with chicken nuggets because it was just too hot, so changed it out for a 60-watt bulb and that seems to provide sufficient heat.

We learned a trick a few years ago: we make a box for them without a bottom, and put down a plastic dropcloth under the box. Then when their bedding needs to be changed, we just pick up the plastic and take it to the woods or the garden to dump. So much neater and easier than trying to clean the bottom of a box.

These little ones are supposedly all pullets. Our old girls will be given away when the young ones start to lay. I find it not at all worth the trouble to dress them out, and usually someone takes them and keeps them to lay for a few more years, which is fine by me. After five years, though, their production is really poor and it's not cost-effective to keep them in my book.

The cats are intensely interested, so we've got the babies under a good security system. The cats usually lose interest in a couple days, which is a relief. I, however, will probably spend a lot of time every day just watching the chicks peck around and sleep. There is something restful about it, and I can dream of them being big girls out in the coop and tending to the business of providing our breakfast.

Copyright 2012 Susanna Holstein. All rights reserved. No Republication or Redistribution Allowed without attribution to Susanna Holstein.

Monday, September 17, 2012

Of Logs and Cabins and Such

Last week was a full week with such a variety of activities I hardly know where to start. Perhaps I'll work backwards and start with the logs. Larry and our son Derek got the last of them in place yesterday--a lot of heavy lifting, dirt and sweat went into getting this part of the project complete.


 This is the front wall; there will be a porch running the length of it. This is about 22 feet long. Larry will be going back to trim the log ends; since we didn't put the logs back in the original shape and position, they didn't fit exactly like they did in the old cabin. We also had a lot of loss--some of the logs had extensive rot and could not be used, others we were able to use by cutting out the bad places and using the solid parts for the short sections we needed. Some will still need work filling in holes, etc. These were not in as good a condition as the first cabin we took down, but we were able to get enough to complete the room. We had none left over, except some scraps for firewood. It was close as to whether we'd be able to finish or if we'd have had to find another cabin somewhere (actually we have spotted two but right now we're not really wanting to get into another tear-down project!).


This looking out the front window, right into the apple tree and the grape arbor. I'm thinking some bird feeders are in order here. The porch, of course, will have some rockers and probably a resident pair of binoculars.


And this is the side facing northwest; it's about 16 feet long. Windows and doors have a couple advantages: they allow us to use some shorter sections of log which helped to make use of the ones with bad places in them, and it also made it a lot easier on the log lifter!


 I love the way the logs come together in the corners. The handwork of men 200 years ago or more has stood the test of time.

I need to get out under the apple tree to take a picture of the room from outside. I was busy cooking yesterday while the guys worked--first a good breakfast of eggs, grits, fried apples, bacon, cider, coffee,toast; then dinner of beef stew, bread and apple pie. Someone has to feed the crew, right?

The poutin' house, the little cabin Larry moved last winter, is still on hold until we get this room under roof. Then Larry will get back to work on it. He wants it to be fairly sealed in by deer season so he'll be working on the chinking.You can barely see it in this photo, down in the woods to the left.

Here's a better photo of the poutin' house. I love the way it seems to fit so naturally into its surroundings. When it's finished, it can be a primitive guest house, for those who don't mind very simple living and a woodsy atmosphere.

Next post, I'll catch you up on all the storytelling last week. And then there was the canning I did, and news about my antique mall booths...several posts, coming up!


Copyright 2012 Susanna Holstein. All rights reserved. No Republication or Redistribution Allowed without attribution to Susanna Holstein.

Tuesday, January 10, 2012

Quick Fix: Chair Re-Do

This is the little chair I bought at a yard sale in October for less than a dollar. I had no place to put it until I did the bedroom rearrangement on Monday. Now it has a corner in my bedroom between the new chest and my old dresser, sharing the space with the clothes hamper. The yellow paint doesn't go with my room at all and I didn't want to get into painting it yet, so I came up with this quick fix:

First, I added a flowered cushion, then

I used a crocheted bedpillow cover to slip over the back.

I used a placemat (that matches the one I used on top of the dresser yesterday) to toss over the pillow cover, and a sweet little sachet I've had for a while to dangle from one corner, and the quick makeover was complete:


The little chair looks right at home in my room, doesn't it?

Tuesday, July 12, 2011

A Random Collection of Housekeeping Things

I've been collecting these tidbits to post at some time or other, so today is the day.

First, for all you canners out there: Lehman's Hardware in Kidron, Ohio sells canning jar lids in bulk. A sleeve of them contains 354 lids, and it's $42.95 plus shipping (I think my total was about $55.00). This is just lids, not the rings. It's a little cheaper than I pay at the store, and a lot more convenient to have all the lids I need right here and not have to worry about not having them when I need them. I think one sleeve will last me through the canning season. They also sell reusable lids (who knew there were such things!) and the old kind that use the rubber gasket, along with all sorts of other useful canning and homesteading supplies. Their specialty is non-electric items, since they are in the heart of Ohio's Amish country.

Did you know you can buy USPS postage through Paypal? It's a lot easier than the USPS website, friends! And so simple to pay too. You need a Paypal account, of course, and it's not easy to find the service on their site, but this link will get you there. I buy online postage for my sales on Amazon and eBay but sometimes I need to buy it for other things I'm shipping and this Paypal service saves me a trip to the post office.

I am drying my peppermint and other herbs for teas and wanted to make them into teabags to share with friends. I looked online for resealable teabags and most were just too expensive--might as well just buy the tea. But at San Francisco Herb Company you can get 50 of them for $2.12. The rub is that you must order at least $30 worth of stuff from them--which isn't hard to do considering their prices and the items they offer for sale. I used to buy from them years ago and forgot them when I went to work. It's nice to reconnect with such a good company. They offer bottles, bags, herbs, dried foods, teas, and all sorts of other interesting things.

A couple of things for general household cleaning:

Put a bay leaf in your flour and dried grains to keep the miller moths out. I've been battling them for the past year and I think I have finally won. All it takes is one item that gets infested with them and you're sunk. They get into dried beans, rice, flour, oats..even baking chocolate and your garden seeds! I took most items out of the cabinet and put them in the fridge, cleaned the cabinet and waited. The moths were still there. I eventually located the source of the trouble--dried apple and orange garlands I had stored in another cabinet. Who would have thought? Then I remembered my mother's trick with the bay leaves. I scattered them throughout my cabinet and tucked them into the jars of flour and oats. No more problems...at least, not for the past 3 months.

My granddaughter taught me this trick: if you have a pan with really stuck-on cooking (like cheese, gravy, meat drippings, etc), fill the pan with soapy dishwater and put it on the stove to boil. Once it's boiling, use a spoon or spatula to scrape off the stuck stuff--it will come right off. Amazing. It took me 60 years to find out about this trick!

Make your own window cleaner with Dawn dish detergent, ammonia and water. This is what the commercial companies use and it doesn't need to be wiped down after cleaning like Windex does. You can adjust the ingredients to get the kind of sudsing you want. Or you can visit Tipnut.com for a lot of ways to make window cleaner, mostly with things you already have on hand.

Got a jar with a stuck lid? Try running very hot water over the lid--often the contents in the jar are sticky and the hot water will soften the sugars enough to let you remove the lid. If it's a two-piece canning jar lid and that doesn't work, take a table knife and run the blade under the top lip of the jar (the place where the ring seats on top of the flat lid). Dampness can cause the ring to rust to the lid and you can break the rust loose this way. The ring, however, might be ruined because it might not seat properly on the lid again. But it beats throwign away a whole jar of something you worked hard to put up.

That's my list for today. Do any of you have little tricks you'd like to share? I am betting you do!
Related Posts Plugin for WordPress, Blogger...