Pages

Showing posts with label herbs. Show all posts

Tuesday, May 6, 2025

Herbs and Hail

52°f/11°C, partly cloudy after an afternoon and night of storms and heavy rain. 

I begin to wonder if our soil will ever dry up! From last year's drought to this monsoon Spring is just crazy. Look what we had yesterday:


Hopefully this is the end of the storms, although showers are in the forecast again this afternoon.

I was able to work outside earlier in the day, getting the herb garden fertilized with blood meal, bone meal, and lime. Then put down cardboard and covered that with mulch. I ran out of mulch before I got the bank covered, though. I have planted that bank with oregano, which I transplanted from another garden, hoping it will become a ground cover. 

Looking downhill. This garden is about 15×20, with concrete blocks terracing it into 2 spaces. The blocks line each side of a walkway, and I have filled them with parsley, chives, thyme, and Marjorie. In the upper garden, covered in mulch, are 2 kinds of fennel, 2 kinds of sage, 2 kinds of basil, chamomile, tarragon, dill, pineapple sage, lavender, rosemary, calendula, and wild daisies and red clover that self- seeded.  Probably a few other things I have forgotten.


There are asparagus and daylights on the bank too, as well as daffodils, Dame's Rocket and some invasive honeysuckle I have been trying to kill. Oh, and some raspberries we also transplanted there last year, which amazingly survived the drought.

Once I get finished with this bed, there is the problematic lower bed which is a tangle of random self-seeded asparagus, raspberries and bindweed. The bindweed is literally all over this garden. I think I am going to do the cardboard and mulch here too, then very carefully use a weedkiller on whatever bindweed comes up. I hate weedkiller but have tried every other solution under the sun and none have worked. Even this will be hard to do to avoid killing the asparagus or the raspberries.  

Today we are off to buy replacement picket fence panels to replace the ones broken by the fallen tree, and then later I have a pedicure scheduled. Ah, to be coddled! I have gradually come to realizing that I deserve this treat, so it will become part of my life from now on. For years I have been a low-maintenance woman, rarely getting my haircut professionally, wearing little makeup, not into fashion, etc, so I think it's time to spend a little on myself! Manicures would be useless as my hands are always in dirt, water,  or paint. But pretty toes? That I can do.

Friday, December 11, 2020

Covid Journal, Day 266: A Little Help from the Sun: Vanilla, Vinegar, and Pot Marigold

40 this morning, feels almost balmy.

I've been making a few simple things in the kitchen. Two are on the windowsill, being aided by Mr. Sol.

First, vanilla. I made my own lo these many years ago, and finally got around to doing it again. The process is simple: a clean, sterilized bottle, vanilla beans slit lengthwise, and alcohol. I used vodka so there would be less other flavoring in the vanilla, but you can use bourbon or brandy too. I used  bourbon before and liked the result, also used vodka and liked it too.


Put the beans in the jar, pour the alcohol over them, seal and put in a sunny window. Give the bottle a shake a couple times a day and wait. I heated the vodka just to warm to speed the process a little. My vanilla will be ready in a month or two. I used Grade B Madagascar beans. This isn't a project for the impatient, but worth the wait. I leave the beans in the bottle; I will add more alcohol at some point and let them steep again. 


Dill vinegar. Again, a simple process. Wash the dill, let it dry. Put the stems or seeds if you don't have stems, in a sterilized jar, pour vinegar over, and seal. I used white vinegar, but cider vinegar works just as well, just has a stronger vinegar flavor in the finished product, to me anyway. Put the bottle in the window and let it sit a while. This is faster than vanilla, probably ready to use in 2 weeks. Taste to see if it's strong enough for your taste. Take the dill out of the bottle and store the bottle away. 

I sometimes make rosemary oil too. A similar process--put rosemary in a bottle, cover with a light olive or other oil, and put in the window. Wait. When the flavor is to your liking, remove the rosemary, and store. I grabbed a little of the late dill in the garden to get this made a couple weeks ago. Good thing, because the dill is gone now, victim of the cold.


Lastly, calendula petals, a plant called pot marigold in the UK with good reason. Calendula has been used as a saffron substitute for years, although it really only adds the yellow color and has a unique flavor, but doesn't really taste like saffron, sorry. 

I simply pull the petals from the flower, and let them dry. Not in the sun, though--these need a place away from direct sun to dry. I find that the top of my stove, which stays a little warm because of the pilot lights, is ideal. Once dry, store in a bottle in a dark cupboard. This website has suggestions for harvesting and using calendula. It's too late for this year, of course, but you might want to add calendula to your garden plans for next year.

Copyright Susanna Holstein. All rights reserved. No Republication or Redistribution Allowed without attribution to Susanna Holstein.

Wednesday, May 11, 2016

Herbal Legend and Lore: Rosemary, Sage, Fennel and Marjoram

Maybe I should have followed the old song's lyrics and had parsley, sage, rosemary and thyme all together! But I did two of them yesterday, so today let's look at a few others.

Rosemary is the herb of remembrance.It is also a bringer of beauty, if one washes with it. English herbalist and writer Gervase Markham wrote in 1615 that "rosemary water (the face washed therein both morning and night) causeth a fair and clear contenance." The herb is also supposed to aid memory, and even as far back as ancient Greece students wove crowns of rosemary to wear when taking exams. A healthy rosemary plant might indicate some power struggles in families, as a good strong rosemary plant growing in the garden was thought to indicate that the woman was the head of the household. A strong plant and a weak plant might be a good plan to preserve family harmony!

In Catholic tradition, it was said that the flowers of the rosemary plant were once white, but when the Virgin Mary laid her cloak down on them, the flowers turned blue. While it is true that some rosemary flowers are blue, there are also white, pink and lavender varieties.


Ah, sage! What would sausage and stuffing be without this pungent herb? Another of the Mediterranean herbs, there is also a sage that is native to the southwestern regions of America and it is a sacred herb to many Native Americans, used in a variety of religious rituals and healing remedies. Smudging, or burning bundles of sage, is a purification ritual. 

Sage has long been considered the herb of wisdom--we refer to a wise person as a "sage" and to good advice as being "sagacious." Ancients also thought use of sage could prolong a person's life and thus it was considered the herb of immortality.

Fennel was never one of my favorite herbs. In fact, its licorice flavor did not appeal to me at all. Recently I've begun experimenting with using fennel in a few recipes and have been surprised to find that I like it. Maybe my tastes have changed? Fennel is a member of the carrot family and is yet another herb that originated in the Mediterranean region and then spread all over the world. One fairly creepy belief was reported by the Roman author Pliny who said that snakes would rub against fennel to improve their eyesight. Apparently the early Brits thought the same, for an old herbal included the following rhyme:


'Whaune the heddere (adder) is hurt in eye
Ye red fenel is hys prey,
And yif he mowe it fynde
Wonderly he doth hys kynde.
He schall it chow wonderly,
And leyn it to hys eye kindlely,
Ye jows shall sang and hely ye eye
Yat beforn was sicke et feye.'--from the website Botanical.com
Which says, basically, that is an adder (snake) is hurt in his eye, he needs only rub against and chew red fennel and his eye shall be healed. Hmmm. My fennel is copper fennel. I hope it doesn't attract sick snakes...

In Medieval Europe, fennel was thought to protect against ghosts and evil spirits. So, if you feel you need such protection, hang some fennel over your door and put some fennel seeds in your keyhole. Medicinally, fennel syrup was used for cough medicine, and fennel was also thought to repel fleas.

from Wikipedia
Sweet Marjoram, it was once believed, would only grow on the grave of a deceased person if the person was happy. However, if you lived in Portugal, you were likely to stay away from marjoram because smelling it could make your nose fall off!  Marjoram was used for whooping cough relief and for a mouthwash. It is another Mediterranean herb, One old love charm was  made with marjoram, marigold flowers, thyme and wormwood. These were simmered with honey and vinegar, and then used to anoint breasts, stomach and lips, repeating, "St. Luke, St, Luke, be kind to me, In dreamlet me my true love see." (Dictionary of Plant Lore). 

Marjoram was another herb considered to be the bringer of love and beauty. According to the website Mother Earth News, 

"The Greeks — who gave the plant the name Origanum, meaning "joy of the mountains" — crowned newlyweds with marjoram to wish the couple enduring happiness, and laid wreaths of the herb on graves to insure the contentment of the dead."

So there's four more of our familiar spice shelf herbs. Seems that there is much more to them than adding flavor to our spaghetti and fish!


Copyright Susanna Holstein. All rights reserved. No Republication or Redistribution Allowed without attribution to Susanna Holstein.

Tuesday, May 10, 2016

Herbal Legend and Lore: Basil, Parsley, Thyme and Dill

Sunday I planted a few herbs in a concrete planter. For years I've grown my annual herbs from seed planted in a garden, but this year I'm changing it up. I realized that I didn't need near as much as I was planting, and that I preferred to have the herbs close by and accessible. Perhaps it's a sign of aging, but planters have slowly been taking over as my planting choice for annual flowers too.

So into the planter went basil, dill, thyme, and parsley. I still have oregano, chives, thyme, fennel and a few others in the garden--the perennials. Rosemary and sage are in big planters on the deck that I can move indoors in winter to keep them alive. Our winters, with their extremes of temperature, are not kind to these tender perennials, and even thyme has a struggle to survive them.

As I planted I realized that I know little about these plants. Well, I know that most of them come from Mediterranean clime. And I know how to dry or otherwise preserve them and how to cook with them. But I don't know a great deal about their history, or the folklore attached to them. So I've been doing a bit of reading up, and here's some of what I have learned.

Our herb garden in 2011. Perennial weeds eventually took over this space, and it became impossible for me to keep up with it, so the herbs were moved to new locations in various flower beds. Except the fennel, which does not like to be moved, so it still occupies a small space in the center of this plot along with some chives.
Basil: to have a successful planting, you must cuss the basil as you plant. Really? Really. And if you want to attract the attention of the opposite sex, put a planter of basil on your balcony or doorstep (Romeo, Romeo, wherefore art thou? I wonder if Juliet had some basil on her balcony?). Basil might also cause the unwary to have scorpions in their brains. How that could possibly happen the folklore doesn't explain, but just so you know. Given that belief, basil was thought to be a harmful plant, but others considered it to be healthful and a bringer of happiness. Take your pick.

A basket of herbs, ready to dry, from a blog post in 2008
Thyme: Often used as a strewing herb, thyme was believed to have been in the bedstraw when Mary bore Jesus. Strewing herbs were scattered on the floor and around a room to remove unpleasant odors in bygone days, and you can imagine how nice they would smell when trampled underfoot. Fairies, the old lore says, could be found in patches of wild thyme. Thyme was also a key ingredient in at least one love potion, and was used in purification ceremonies. Wearing thyme in your hair might help attract a lover too, so along with basil on your porch, you might want to tuck some thyme in your hair.

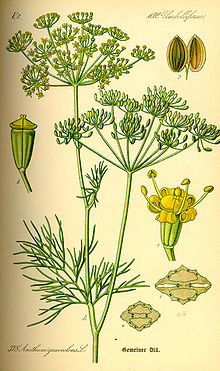
Dill: Sometimes called meeting herb because in colonial times ladies chewed the seeds during meetings to stay awake--a trick that we might need to revive! However, some think today that chewing on dill will induce a good night's sleep, so take your choice. Chewing dill seeds is also thought to cure hiccups, and to ease the pain of gout and arthritis. While other herbs are sometimes mentioned in folktales, I do not think I've ever encountered a mention of dill, but there are sure a lot of dill jokes.

Dried parsley
Parsley: While basil must be cussed at to properly germinate, parsley, according to the ancients, has to travel nine times to the Devil before it sprouts--one explanation for why it is so difficult to get the seeds to come up.  The seeds that don't germinate are the ones the Devil keeps! Whoa. I learned to plant in June, and cover the seedbed with newspaper kept moist to encourage good germination. There are some not-so-great associations made with parsley: "Welsh parsley" was slang for the gallows rope, and parsley was associated with other bad luck in many places. In several cultures it was connected with death, and used to scatter over a grave at a burial and to make funeral wreaths. However, the Romans fed parsley to their horses to keep them healthy, and its roots were considered an aphrodisiac. As we now know, parsley is full of vitamins and minerals and considered a healthy as well as attractive addition to foods.

This is just the tip of the iceberg where herbs and their lore are concerned. Here are a few websites to explore for more fascinating insights into the past and present of our culinary herbs:

Our Herb Garden is a compendium of myth and practical advice for the herb gardener.

Mother Earth Living provides history, folklore and growing tips.

The Sanctuary Gardener is a blog by a southern transplant that explores all kinds of gardening wisdom and homesteading, including herbs.

A booklist for further reading by Madronna Holden, Oregon State University.

Then use all those herbs you've grown to make your own bouquet garni for soups and other dishes.


Copyright Susanna Holstein. All rights reserved. No Republication or Redistribution Allowed without attribution to Susanna Holstein.

Wednesday, January 4, 2012

Making Tea...Bags

I posted something on Facebook about making teabags and got a few questions, so I thought I would show the process here. It's very simple really:

1. Dry your herbs for your tea. I was making peppermint bags from peppermint I dried last June. Then decide what combinations you might want to put together. I like peppermint, rose hips and orange peel, but this time I just did plain peppermint because that's what Larry likes. You could also make individual size mulling spices with cinnamon sticks, whole cloves, allspice and orange peel to spice up your apple juice, cider or wine. Another possibility is buying bulk loose tea and bagging it yourself.


2. Purchase sealable teabags. I buy mine from the San Francisco Herb Company. They offer a wide selection of teas, herbs, spices and supplies for reasonable prices. The only hitch is that your order must total $30 and that is a lot of stuff! Get out your iron.


3. When your herbs are ready, crush them to the size needed to fit in your bags. Fill the bags,


then seal with an iron set on the "Cotton" setting and NO steam.


4. You're done!

Monday, August 1, 2011

Making Bouquet Garni

It's herb harvesting time, and the dry weather we're having is a good time to cut them. I like to cut my herbs in the early morning before the heat of the day so that I get the best of their essential oils and fragrance before the sun takes it out of them.


Yesterday I harvested basil and have it hung to dry. An airy place out of direct sunlight is best for drying herbs. I have an old oak wall rack that was designed as a towel rack that works perfectly. It folds away when not in use. My rack hangs over a shaded window, and since my ceilings are fairly high there is plenty of air circulation to dry the herbs quickly. I've been using this rack for over 30 years; surprising to realize that so much time has passed since we rescued it from the scrap pile at the site of an old house being torn down.

I also harvested the curly parsley yesterday; I put it on a cookie sheet in the oven (with only the pilot light on) to dry. Twenty-four hours later, it is dry and ready to be stored away.


Today I cut thyme, flat parsley, winter savory, chives, marjoram and celery leaves. I am making bouquet garni to store away for winter use. Bouquet garni is a bundle of herbs used to flavor cooking. The combination considered "classic" is thyme, bay leaf and parsley, but you can create any combination you like. I've made several different ones this morning, the classic along with combinations of the other herbs I harvested.

It is simple to make a bouquet garni. Pick fresh herbs, wash and pat them dry with a clean towel, then pick and choose a combination to suit your taste. I like winter savory, celery, thyme, parsley, and bay leaf for stews and beef or venison, and celery, thyme, parsley, bay and marjarom for poultry dishes. I will make some with rosemary too, for beef and venison--that combination will be rosemary, parsley and bay. Today I am cooking rice with bay, winter savory and parsley to serve with chicken for tonight's dinner.


It takes just a sprig of each herb, and a leaf of bay, for each bouquet. You can put the herbs into cheesecloth and tie with string, or just tie the bundles together. To differentiate between the kinds you have created, you can tie them with different colored strings or ribbons--red for bundles best suited for beef, for example, pink for chicken, etc. Once your bouquets are made, hang them to dry as above, then store in a dark, dry place until needed. They do look pretty hanging in the kitchen, though! Just be aware that they will lose color and potency if exposed to light for any length of time. I have seen wreaths made of bundles of bouquets, and these are very pretty--again, they will lose some flavor and color, but if you're not worried about that, a wreath is a fragrant addition to the kitchen.


To dry multiple bundles, suspend them from a ribbon or piece of string or rope in a dry, airy place that is out of direct sunlight, as I described above. You can also put the bouquets in paper bags, 2 or 3 to a bag, and hang them like that to preserve even more color.


A simple way to dry multiple bouquets is to suspend them from a coathanger--I used a metal hanger and safety pins to hang the bundles; it's a little tricky to keep them in place! It might be easier to secure each bundle to the coathanger with a little piece of tape.

To use, suspend the bundle into the cooking pot or just drop it into the pot; remove it when the recipe you are making is done. Some people like to tie their bundles into cheescloth to assure no pieces of herbs get into the food being cooked. I just drop mine into the pot and fish it out when it's time. You could also make a hanger from a paper clip and use that to suspend your bouquet into the cooking pot. Whatever method you sue, be sure to remove the bouquet when you're finished cooking so that no one gets a surprise on their plate.

Back to the kitchen. There is still a pile of herbs waiting for me.

Monday, June 21, 2010

How to Make a Lavender Wand and Win One Too

I’ve wanted to learn how to make lavender wands ever since I first knew what they were. I looked at instructions but I’m a tactile learner—I have to see it done and do it myself to really get it sometimes.

So when I saw in the Folk Festival newspaper that there would be classes on making wands, I made sure to find out about it. Wouldn’t you know, it was my friend Melissa Dennison who was teaching the craft! Melissa had a booth in the crafts show and was selling her soaps, herbs and lavender wands. In no time at all she put me to work and I had a finished wand in about 15 minutes.

Today I am off work because it’s my birthday (isn’t that cool, we get our birthday off!). I had to go in for a couple hours this morning to start my guys on a project, but I was home by 10am. The lavender beckoned; it is at the perfect stage for making wands right now and I figured I’d give myself the gift of a few minutes to try wand-making on my own.

It was just as easy as Melissa had promised. Here’s how I did it. Remember, this is my first attempt so you might want to look at the instructions here and here for directions from other sites.


Step one: Cut your lavender with stems as long as possible. You want to use fresh lavender for this craft because it will lose pliability and flower buds if it’s too dry. I have the old standard lavender and it grows some really long stems, which are perfect for this purpose.


Step 2: gather your supplies. You need lavender, rubber bands, scissors and ribbon. That’s it.


Step 3: Put together a bundle of about 15 stems. I’ve seen all kinds of recommendations as to the right amount; I used 15 and it worked pretty well. Even up the flower heads; it doesn’t matter if the stem ends are uneven because you’ll be cutting them off at the end of the project.

Step 4: put a rubber band tightly around the bundle of lavender just below the flower heads.


Step 5: Cut a long piece of ribbon—at least 3 or 4 feet long. You can use thin or thick ribbon, it doesn’t matter. I found that the ribbon that was very narrow was harder to work with, but maybe that’s just me. It takes more thin ribbon too, because there's more weaving to do.

Step 6: Tie the ribbon around the stems, over top of the rubber band. Wrap it several times around the rubber band to cover it.

Step 7: bend the stems over the rubber band so that the flower heads are under the stems. Make sure you space the bent stems evenly around the bundle of flowers in the center. This makes a “cage” with the flowers inside, if that makes sense.

Step 8: using 3-4 stems held together in a bunch, begin basket-weaving the ribbon in and out. You will want to make sure you have an uneven number of bunches so that the weaving comes out right.


Step 9: continue to weave ,pulling the ribbon tight as you go, until the flower heads are completely enclosed by the woven stems.

Step 10: Pull the ribbon tight and secure with a slipknot. Tie a hanging loop in the end of the ribbon.

Step 11: Cut the stems off evenly.


Step 12: Enjoy your wand!

I made three today: the first took 20 minutes, the second 10 and the third, the one with the thin red ribbon took about 20 minutes because there was a lot more weaving involved. I included one made by Melissa as an idea of a variation on the wand--this one looks like a little basket filled with lavender buds.

Melissa did say something about the need to tighten the ribbon after a few days, as the wands will dry and the ribbon will become loose. I haven’t done this part yet, just passing on the information.

Now, since it’s my birthday, I will send one of my wands to a lucky someone as a thank-you gift for being a reader. All you need to do is be a follower of my blog and leave a comment here within the next three days. Good luck!

Wednesday, June 16, 2010

The Recipes!

Here are the recipes for what we cooked last night with our grape leaves. Our meal consisted of:
*Grape tomatoes
*New potatoes and our first half-runner green beans cooked with bacon (Larry made these)
*Sourdough bread with cucumber-yogurt dip
*Chicken and Goat Cheese Wrapped in Grape Leaves with Bell Pepper Sauce
*Goat Cheese Wrapped in Grape Leaves

Do I have any photos? I don't! I completely forgot to take any; we were so wrapped up in our cooking that it never crossed my mind to grab the camera. Take my word, though, the results were as pretty as they were tasty.

The foods that came from the garden for this meal: potatoes and green beans, rosemary, sage, dill, basil, onions and garlic, egg and grape leaves.

The first recipe is delicious and really not difficult to make. I don't like green peppers raw, so the sauce almost stopped me from making this. But I made the sauce anyway, and it was amazing. I am so glad I didn't let my prejudice stop me from trying it!


Chicken Breasts and Goat Cheese in Grape Leaves, with Bell Pepper Sauce
(this recipe is from the National Chicken Council, but I've modified it a little )

4 boneless, skinless chicken breast halves (we used those frozen chicken tenders, thawed of course--they were just the right size for our grape leaves; we made 5 altogether using the amount of ingredients in this recipe)
1/2 teaspoon salt
1/4 teaspoon pepper
6 ounces fresh goat cheese (I used less than this because my pieces of chicken were smaller and a smaller amount fit just right. I used about 4 oz of cheese)
4 fresh basil leaves
4 fresh sage leaves
8 or 12 grape leaves in brine (I used a good bit more, because my leaves were small so I had to overlap them to properly roll up the chicken. I used the leaves I'd just put in brine the day before and they worked great)
1 garlic clove
1 sprig rosemary
Bell Pepper Sauce: see below--it's yummy!

1. Sprinkle chicken breast with salt and pepper (I didn't so this--just forgot, but ours tasted fine).

2. Divide cheese into 4 portions and spread on top of each piece of chicken.

3. Place 1 basil leaf and 1 sage leaf on top of the cheese

4. Wrap chicken with 2 or 3 grape leaves. (I started with the chicken in the middle and made sure I had enough grape leaves to completely wrap it. I folded in the ends first, then started rolling from the large side of the leave to the tip, if that makes sense. I used 3 or 4 leaves per piece of chicken because as I said my leaves must have been smaller than what is usually used)

5. In large saucepan with steaming rack, place about 1 inch of water; add garlic and rosemary and bring to a boil (I used my crab steamer--never have used it for crabs but it worked perfectly for this. You could use a colander too, or maybe a cake rack in the bottom of a pan).
This part smelled so good!

6. Arrange chicken on steaming rack, cover and cook on high heat for about 20 minutes, making sure that the water doesn't completely evaporate or touch the wrapped chicken. Place chicken on serving plate and pour the sauce (below) around it.


Bell Pepper Sauce (I want to use this sauce for other things too!)

1. Slice two green bell peppers (I used one BIG one) and 1/4 small onion; put through a juicer (I used my blender--worked fine). In a small saucepan, place pepper-onion juice, 3 tablespoons olive oil, 1 teaspoon salt and 1/8 teaspoon pepper; bring just to a boil. Serve over the chicken wrapped in grape leaves.

(The recipe said that ricotta or cream cheese mixed with Parmesan could be substituted for the goat cheese.)

The second recipe is really more of an hors d'ouevre and was quick to make. Amy did this one by herself in about 10 minutes. The little bundles were delicious, tangy and melt-in-your-mouth soft.

Grape Leaves Stuffed with Goat Cheese (recipe is from the RecipeZaar website)

1 (7 ounce) package mild goat cheese (or 5 oz goat cheese plus 2 oz softened cream cheese)
1 tablespoon minced chives (I had some frozen so we used those)
1 tablespoon beaten egg
fresh coarse ground black pepper
12 large grape leaves
olive oil

Directions
1. Preheat oven to 350F.

2. Cream together cheese, chives, egg and pepper to taste.

3. Wash grape leaves and pat dry.

4. Remove stems (we didn't do this since I'd trimmed the stems way back when I packed the leaves in the brine)

5. Working with one leaf at a time, place 1 rounded tablespoon of the cheese mixture at the stem end of each leaf.

6. Roll up tightly, tucking ends in to form a cigar shape.

7. Place rolls, open end down, (meaning the edge of the last leaf rolled) on a greased baking sheet.

8. Brush generously with olive oil.

9. Bake for 10 minutes.

10. Serve hot or tepid.

Last recipe for today:

We served sourdough bread and cucumber-dill dipping sauce with the meal.

Cucumber-Dill Dipping Sauce
We modified a recipe to come up with this version that we liked very well. Tangy, a little sweet and so cooling.

1 seedless cucumber
1 cup plain yogurt
1/2 cup sour cream
fresh dillweed (about a tablespoon)
salt and pepper

Cut the cucumber into chunks and blend in a blender until it is smooth. Pour into a cloth-lined colander and squeeze out about half of the juice from the cucumber pulp. Put in a bowl and add the yogurt, sour cream and dillweed. Mix well. Add salt and pepper to taste.


The dinner was a lot more cooking than I normally do on a weekday evening, but it was so much fun. Since the evening was dripping-humidity-hot, it was a good way to use the time because we sure didn't want to be outside in that heat.

Wednesday, May 12, 2010

Time to Gather

It's time to gather in the herbs.

Best time of day: late morning

Best weather: dry and sunny

Best herbs: all the ones you love the best

How to dry: And here is where simplicity ends. Not that drying herbs isn't simple: it is. But there are several ways to do it.

Here are the ways I've dried my harvests:


Method #1. Hanging them up, A and B.
A. pick the herbs, put into bunches using string, ribbon, rubber bands or what-have-you, and hang up in a dry, airy, out-of direct-sunlight place.
B.pick the herbs, put into bunches using string, ribbon, rubber bands or what-have-you, place inside a brown paper bag and hang up in a dry, airy, out-of direct-sunlight place.


Let them hang until completely dry, then either:
A. remove from stems and put into air-tight containers. Place in a location out of direct sunlight.
B. leave them hanging up because they look pretty and use as needed.

(Why the caution about sunlight? The sun will remove color, oils and nutrients from your herbs as they dry, leaving them colorless and pretty much flavorless.)


Method #2. Remove leaves from stems; place leaves in an open, flat basket and put in a dry, airy, non-sunny place to dry. Stir from time to time to allow the drier leaves to speed drying and to ensure even circulation of air. When completely dry, place in an airtight container and store away from direct sunlight.

Method #3. Remove leaves from stems; place leaves on a cookie sheet in a slightly warm oven. 200 degrees is too warm; you want something like 110-120 at the most. Stir occasionally so they dry evenly. Store as above.

Method #4. Remove leaves from stems; place on trays in a dehydrator and turn it on. Watch carefully so leaves don't get too dry and loose all their oils and flavor. Store as above.

Which method do I prefer? I like method 1A because it's simple and the hanging herbs add a beautiful touch to my kitchen. I have an old wood drying rack that is over a window that does not get direct sunlight, but allows plenty of air movement. The herbs dry quickly and keep their color and flavor if I take them down as soon as they are dry and store them properly.


I have been using method 2 this year for my teas like raspberry and blackberry leaves, peppermint and red clover, and I find that the herbs dry quickly and retain more flavor than they do using either method 3 or 4. Heat seems to remove too much flavor and body from the leaves, I think. And there's always the danger of roasting them instead of drying them!

The absolutely most important thing to do when storing your herbs: mark the containers with the contents and the date! I seldom do this, and end up with jars of mystery, green and fragrant but what is it and when did I put it up? Usually the smell is a dead giveaway, but not always--some herbs retain flavor and color pretty well. But if I've got a new harvest, I usually want to give the old herbs to my hens and enjoy fresh new ones. So mark your jars-- there's nothing quite as surprising as lemon balm in the spaghetti sauce (what can happen if an unknowing hubby picks up a jar that looks like oregano...)

Monday, May 3, 2010

Tea Time

(photo from trademe books ; it's still available there and on Amazon as a used book.)

It's time to think tea. Not sweet Southern tea, not black tea, but herb tea. This is the perfect time to gather some of my favorites.


I almost forgot about teas in the rush of getting gardens ready. With limited time and many projects it can be easy to let the right time for harvesting slip right by me. Tea was on my to-do list for the past weekend, but the gardens too most of Saturday and Sunday's rain washed out any chance of bright dry sunshine which is perfect tea-gathering weather.

So my harvest is on hold. I did well two years ago, picking and drying most of my favorites. Last year I grabbed a few things on the run, but that was it. This year I intend to do better. We shall see.

I found the above book at a used book place--the book was in poor condition, so it was dead cheap (like 25 cents cheap). When I opened it, the pages fell open to Coltsfoot. Yes, our early spring friend can apparently be used to make tea. It's not too late to gather it, either. Although the blossoms can be used for tea, the leaves can be too and should be harvested when they reach full size, which is right about now. You can guess--the book came home with me. It's a good resource for a quick history of tea, cultivating herbs, planning an herb garden, harvesting, and blending your own custom mixes. No color pictures but solid information.

What can be gathered now? Most leaf teas like lemon balm, raspberry, blackberry, strawberry, and mints. Some flowers are ready too, like chamomile and roses.

I prefer to dry them on trays in a barely warm oven to drying in a dehydrator because the dehydrator seems to make the leaves too dry, if that makes sense. Hanging upside down in a dry, airy place works well too, especially if you cover the herbs with a brown paper bag to block direct sunlight that takes away the color and I think leaches out the flavor.

Tomorrow evening might be my chance to gather my favorites--blackberry and raspberry leaves. It is supposed to be a dry, sunny day. It would be better to do my harvesting in the morning but this pesky thing called a job gets in the way, so I'll have to make do with evening.

Do you gather your own teas? What are your favorites? Anything new and exotic to recommend? One I read about in this book is lavender tea, which I had not heard of. Anyone tried it?

Wednesday, April 7, 2010

Ah, Spring!

The sweetness of spring is almost painful. Soft breezes, tiny leaves, bright flowers and today the butterflies returned to put the final touch on a beautiful morning.


I am making a new herb garden this year. Actually, this was my herb garden about 10 years ago, but family complained that the gardens (there were two, one on each side of the small walk) were in the way and the dogs seemed to like them too much as a place to dig and sleep. So I abandoned those gardens and made a new one--which has turned out to be too shady for the Mediterranean herbs. I will leave it in place with the plants that do well there--copper fennel, bergamot, chives and a few others--and start again in the old patch which was really beautiful in its prime. I have a bit more digging to do, and we may put in a small brick path in the center. I'm still thinking about that.


On the side of the ridge, redbuds flare their purple-pink against the still-bare branches of oaks and poplars. I am going to try making some redbud jelly and maybe some muffins too. I read that the redbud flowers can be used as a salad garnish, having a slightly nutty taste. Has anyone tried that?


The begonias and gerniums I brought into the house for the winter survived, although they're looking a little rough right now. But they provided a bright spot of flowers all winter, and now they have a head start on Spring. I owe them--even on the snowiest day, they reminded me that Spring would indeed come.

Back to work! That's the other part of spring--plenty to do.


Friday, May 15, 2009

The Elusive Goldenseal


(c) 2006 Steven J. Baskauf , use allowed for personal and educational purposes. From http://www.cas.vanderbilt.edu/bioimages/species/hyca.htm

Goldenseal (Hydrastis Canadensis)


Walk down the north side of a mountain, follow a small stream until you come to a place verdant with ferns, mayapple and wild ginger. That is where you might, if you are lucky, find one of the most revered plants of mountain folk medicine: Goldenseal.

It is not a flashy, standout plant. It grows low, like the mayapple. The two plants are somewhat similar in appearance but share no family relation. The Mayapple is in the Barberry family while Goldenseal is in the Buttercup family. Goldenseal only flowers briefly in Spring, one flower per plant. If you find it in bloom, you will probably admire its green and white flower—it stands erect above the plant, feathery and serene in the dark forest valleys where it makes its home.

Image from N.L. Britton and Addison Brown (1913). An Illustrated Flora of the Northern United States, Canada and the British Possessions. Charles Scribner's Sons, Nwe York, NY. Obtained from http://www.cas.vanderbilt.edu/bioimages/species/hyca.htm


And yet this plant with its one large leaf and one small, a hairy stem and single blossom, is credited with a wide range of medicinal cures. In fact, it was so sought after in the early 20th century that the digging of it nearly caused its extinction. According to early botanists, Goldenseal was thought to be useful for everything from tonics to diseases of the eye and ear to yellow dye. Native Americans extracted its brilliant yellow dye and used it as paint. In 1918, the USDA reported that 200,000 to 300,000 pounds of a drug produced from the root was used . The plant was believed to contain an antibiotic that was effective against several bacterial strains. Goldenseal is still used today in some medical preparations, although the plants used for that purpose are usually commercially grown. Goldenseal can stil be found in the Appalachian mountains, although its range elsewhere still seems to be restricted.

In my husband’s family, Goldenseal tonic was kept as a staple in the refrigerator. His father gathered the roots, dried them and then mixed them with water to make a bitter drink that the family used for sore throats, colds and other ailments. Ever since we were married, Larry has talked about this plant whenever we had sore throats, upset stomachs or colds. Although he looked for Goldenseal every time he was in the woods, he never found it.


Determined and knowing it had to be here somewhere, Larry got online and found photos of the plant, which he printed out. When a day came that he could finally take the time, he hiked off into the woods. We’d talked about where the most likely place to find it would be. And we were right. In the place where the jack-in-the-pulpit grows thick and the mayapples and ferns compete for ground space, he found the plants he’d been seeking.


Larry's Goldenseal roots. Note the yellow color.


While Goldenseal can still be sold to herb dealers who buy ginseng and mayapple (mandrake) root, we’re not interested in selling it. It's enough just to know the plant is growing and thriving nearby.

And we'll keep a little in store, just in case.

Sources for more information:
Core, Earl. Goldenseal. Goldenseal magazine, Vol 6, number 1. January-March 1980.

Coffey, Timothy. The History and Folklore of North American Wildflowers. Houghton Mifflin, NY: 1993. pp 18-19.

Martin, Laura C. Wildflower Folklore. Globe Pequot Press, Conn: 1984, 1993. pp 178-179.

Audubon Society Filed Guide to North American Wildflowers. Alfred A. Knopf, NY: 1979. pp 736-737.

More articles about Goldenseal from Goldenseal Magazine:
Goldenseal 10:1;p2

Goldenseal 15:1;p70

Goldenseal Fall;25:3;p22

Healing from the Hills: Folk Medicine of the Southern Mountains 16:4;p60

In Search of the Wild Goldenseal Fall;25:3;p24


Websites:

Kansas State University Extension Services March 1999 --short article about uses of goldenseal, dosage and how to prepare.

National Institutes of Health --"fact sheet provides basic information about the herb.

US Forest Service article on need for "educating consumers about the appropriate uses of the herb in order to reduce overconsumption; working with growers to increase the profitability of cultivation and reduce pressures on wild plants; and identifying and tracking wild populations to determine the most effective management and conservation practices."

Popular Herb 'Goldenseal' Lowers Cholesterol in Lab Tests --wouldn't this be great if it is proved to be true?

Saturday, May 2, 2009

Garden Update

A quick tour of some of our gardens:

Larry planted tomatoes this week, 75 plants that included several varieties: Early Girl, Brandywine, Mortgage Lifter, Amish Paste, Yellow Pear, Mr. Stripey, Lemon boy, Delicious and Siberian. He left a row for peppers, which I'd like to hold off on for a few more days to let them grow a bit more.


The early garden is thriving: in this garden are onions, beets, peas, leeks, radishes, stonehead and savoy cabbages, celery (far at the top), spinach, chard, carrots (barely up), and Romaine lettuce. Half-runner beans are just coming up at the far left. Those are grapevines up against the building in the rear.

Corn, more beans (Royal Burgundy), and the potatoes are in a different, larger garden. We still have one small area and one more garden to plant: squash, cucumbers, pumpkins, pole beans, and Indian corn will go in there. I will also plant a row of flowers--and some ornamental cotton--in front of the tomato garden.

This is a "volunteer" flower bed. Seeds and plants left from last year seem to have it pretty well taken care of--mostly cosmos, parsley, and honesty (also called money plant). I may need to enlarge it because I have a lot of plants in the greenhouse that need to go somewhere.
The herb garden is out of control. Here you can see from bottom center, thyme, feverfew,purple sage,lemon balm gone amuck, bee balm also mucking about, lemon thyme, and in the back but not visible baby's breath, copper fennel (which is seeding itself everywhere), rosemary, and chives. Somehow I've got to conquer this mess and make room for more herbs--like dill, basil, etc. Once the spent daffodils are out, there will be space. There WILL be space. (I have to convince myself.)
I got a nice surprise the other day when I noticed a bright spot of pink by the bird feeder. I'd planted this clematis two years ago. It struggled along and I'd forgotten it was there. Now it's in beautiful bloom. I found the second one I planted too, doing well although no blooms yet.

Monday, April 20, 2009

A Good Day for Gardening

Sunday was a great day to be in the garden. Rain? Well yeah, a little. But plants moved in the rain never know they've been moved, or such has been my experience.

We got up and out early. The sky was threatening gray and I knew we needed to hurry if we wanted to work the ground before we planted. Larry tilled, I planted.

By 9 a.m. I'd planted broccoli, carrots, Romaine, buttercrunch and ruby lettuce seeds and Larry had the ground ready to put out half-runner beans.

I stopped to make pancakes and he worked ground for corn before coming inside to eat. I jarred up the ramps he'd dried--a full half-pint! I can't wait to start using them in recipes.


We ate and hurried to town to get seed--all the seeds I've bought but did I have the basics like corn and beans? Not exactly; I had Royal Burgundy and wax beans but not half-runners which I do not like. I had ornamental corn and broom corn but not stuff like Early Sunglow and Silver Queen. I am so sensible, aren't I?

We didn't just get seeds of course. A trip to the garden centers always yields more than that. We ended up with plants, potting soil, fenceposts and yet another electric fence charger, among other things. We had to stop at the grocery store too for that indispensable item, coffee. We ran into good friends in town and invited them out to dig up some plants that I needed out of my flowerbeds.

Back home, we hurried to get the seeds in the ground. It had been showering off and on all day, but the ground was still dry enough to plant. I planted celery plants and potted up flowers for the porch. Larry planted beans and corn. (Yes, we're about 3 weeks early, but it's worth a chance. Either the seeds will rot in the ground or get frosted--or we'll have super early veggies. Worth the chance in my book.) I pulled radishes for salad later.
Our friends came out and we ladies dug up plants while the guys went mushroom hunting. When they came back after a successful hunt for mollymoochers (morels) we cooked while Larry and a little friend cleaned out the chick's box and put down new bedding. We made salad from the garden--lettuce, green onions and radishes. I made rice flavored with ramps and added our eggs. Dinner was delicious--salad, morels and rice. We drank Irish Breakfast tea while the guys did dishes and talked about honeybees, mushrooms, tilling gardens and chickens.

Our friends left laden with many plants:
  • Lemon balm

  • Copper fennel seedlings

  • Purple bergamot (also called bee balm)

  • Lily of the Valley

  • Oregano

  • Cosmos seedlings

  • Coreopsis

  • Southernwood

  • Sweet Annie

  • Red Coneflower


And there is plenty more of each of these, a testament to the richness of this West Virginia earth.

It was a very, very good day.

Sunday, April 19, 2009

The Vandalia Garden Festival


It was a beautiful day in Charleston, and the Capitol grounds looked perfect for the Garden Festival. Larry, me and our friend Andrea drove down early to be sure we got there in time for a workshop both Andrea and I wanted to attend.

Melissa Dennison's booth was an active place. Sales of salves, soaps, lavender wands and herb plants were brisk. I was one of the lucky customers! Melissa's workshop on making salves has inspired me to give it a try. I learned a lot, was reminded of much that I already knew, and finally got a look at Goldenseal, a plant I have tried to find many times. Now I know exactly what I am looking for, perhaps I'll be successful.

Melissa is one busy woman. Her herb farm in Braxton County is pretty much a one-woman operation and her depth of knowledge about herbs and herbal lore is apparent. She shared recipes and information freely, passed around many samples and probably sold out at her booth after her workshop. It was that good. If you're interested in her products or plants, here is her contact information:

Garden Treasures Fresh & Dried Herbs, Shitake Mushrooms: Melissa Dennison, HC 69, Box 30, Clem, WV 26623
Phone: 304-364-5589 E-mail:gardentreasures@hotmail.com

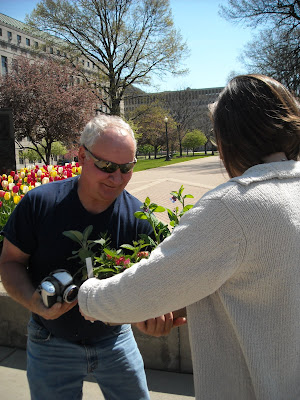
Larry and Andrea balance some of the bounty of the day. The plants for sale were vigorous and healthy, and we were pleased by the selections available.

Here's a close-up of some of our purchases: hardy sage (for me--I've not had good luck with sage over-wintering in recent years), lantana for me, rosemary and bluebells for both of us, purple sage for me, lavender for Andrea, golden thyme for me, and not visible: salves and soaps for both, and my lavender wand.

The tulip bed near the walkway entrance to the Capitol grounds was just stunning, with so many colors. What a sight!

I discovered that there is a WV Herb Association that hosts an annual conference and other workshops. Who knew? Although information on their website is limited, there are some contacts and events listed that might be interesting. And there will be a Fall Conference! But on the same weekend as the annual WV Book Festival. Bummer for me, since I'm obliged by my job to be at the Book Festival. But maybe some of you reading this might want to go. Contact the Herb Association for details.

I also learned that Mountain State University in Beckley, WV offers a degree in Medicinal Botanicals, and sponsors many events open to the public. When I checked out the website this evening, I found that there is an online newsletter available too.

My new plants are safely in the ground and I will be trying some salve-making this summer. I've always had an herb garden and those who have read this blog for a while know my interest in wild foods and herbal lore. I'm excited to know about these opportunities to learn more. It's one topic that will never become old to me.

Wish me luck in my hunt for goldenseal. Surely one day I will be lucky enough to find some!
Related Posts Plugin for WordPress, Blogger...